How to Integrate AWS ECS with Spinnaker
Overview
From this blog, users will have the leverage to explore how to configure AWS ECS with Spinnaker and guide to create a Spinnaker CD pipeline.
Benefits of AWS ECS with Spinnaker
- AWS ECS Services on AWS Fargate with Spinnaker makes it easy for users who would like more flexibility on how to run their service. Like, without a load balancer, or using placement constraints or options which were either missing/hard-coded values at the time.
- AWS ECS and Fargate also added support for all task definition fields and multi-container applications through the use of task definition artifacts. This feature is especially exciting because it gives users complete control over the contents of their task definition and makes it easier to automatically deploy new configurations.
What is AWS ECS?
- Amazon Elastic Container Service (Amazon ECS) is a highly scalable, fast, container management service that makes it easy to run, stop, and manage Docker containers on a cluster. You can host your cluster on a serverless infrastructure that is managed by Amazon ECS by launching your services or tasks using the AWS Fargate launch type. More details about AWS ECS is available here
What is Fargate?
- AWS Fargate is a technology that you can use with Amazon ECS to run containers without having to manage servers or clusters of Amazon EC2 instances. With AWS Fargate, you no longer have to provision, configure, or scale clusters of virtual machines to run containers. This removes the need to choose server types, decide when to scale your clusters or optimize cluster packing. More details about AWS Fargate is available here
Prerequisites:
- This blog is created, assuming you have created the AWS EC2 stage with Spinnaker. It is mandatory to have AWS EC2 Setup in Spinnaker.
- The user should have an active AWS ECS on AWS Fargate.
Step by Step Instructions to Setup AWS ECS with Spinnaker:
- Edit the role that is created as Assumerole for AWS EC2(spinnakerManaged) and update the ‘Trust Relationships’ with the below JSON content.
{
   "Version": "2012-10-17",
   "Statement": [
     {
       "Effect": "Allow",
       "Principal": {
         "Service": [
           "ec2.amazonaws.com",
           "ecs.amazonaws.com",
           "ecs-tasks.amazonaws.com",
           "application-autoscaling.amazonaws.com"
         ]
       },
       "Action": "sts:AssumeRole"
     }
   ]
 }
Optional: Auto Scaling
- Users can also configure Amazon ECS services to use Service Auto Scaling. Service Auto Scaling policies adjust your Amazon ECS service’s desired count up or down in response to Cloud-watch alarms (e.g. tracking the CPU utilization of an Amazon ECS service, or tracking a custom metric) or on a schedule (e.g. scale up on Monday, scale down on Friday).
- Configure scaling policies on your Amazon ECS services using the Application Auto Scaling APIs or in the Amazon ECS console, outside of Spinnaker. When deploying a new server group in Spinnaker, you can copy these scaling policies from the previous service group by enabling the “copy the previous server group’s auto-scaling policies” option.
Add ECS Account and Enable ECS Provider
- The below command allows the user to add an AWS ECS account to Spinnaker.
hal config provider ecs account add ecs-account-name --aws-account aws-account-nameNote: From the above command, ‘ecs-account-name’ is the AWS ECS Account Name and the ‘aws-account-name’ is the AWS EC2 Account Name.
- The below command allows the user to enable the AWS ECS account to Spinnaker.
hal config provider ecs enableNote: Ensure to have AWS account enabled before enabling ECS on Spinnaker.
Step by Step Instructions to Create Spinnaker Pipeline with AWS ECS Stage
- This pipeline includes 3 stages, Build(Jenkins), Bake(AWS EC2) and Deploy(ECS)
- Create an Application and click on the “Pipelines” tab to create a new Spinnaker CD pipeline.

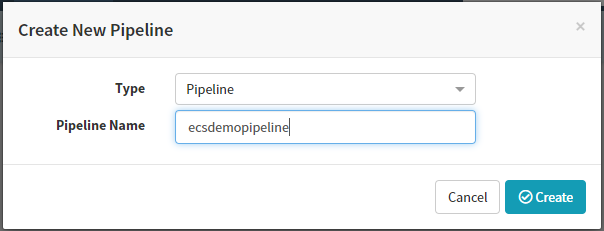
- Click on ‘Configure a new pipeline’ and fill the Pipeline Name field.

Create a new Spinnaker CD pipeline
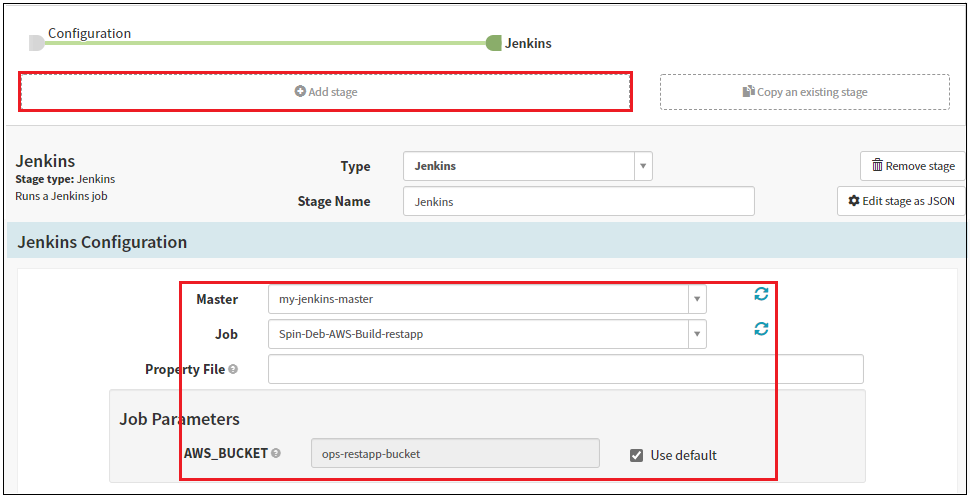
- Click on ‘Add Stage’, select ‘Jenkins’ and add your Jenkins Job as required, and click on ‘Save Changes’.

- Now, click on ‘Add Stage’ and select ‘Bake’. Fill up all the mandatory as done on AWS EC2 Bake Stage.

- Finally, click on ‘Add Stage’ and select ‘Deploy’ then click on ‘Add Server Group’ under ‘Deploy Configuration’.

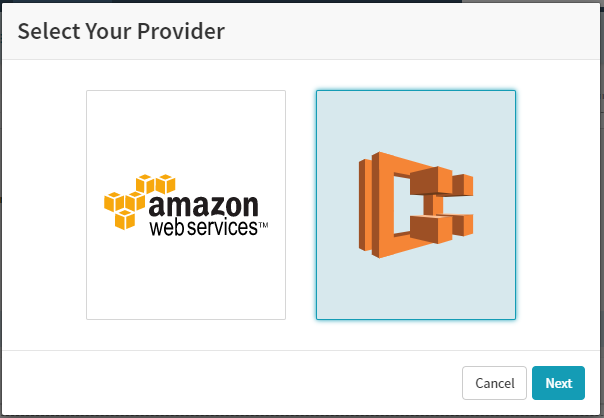
- Select ‘ECS’ as Cloudprovider and click on ‘Next’.

- Now, start filling up all the mandatory fields like:
- ECS Account
- Region
- Cluster Name
- Enter Stack & Detail(Optional)
- Strategy – In this scenario choose the Red/Black deployment strategy option(Disables all previous server groups in the Cluster as soon as new server group passes health check).
- Network Mode – awsvpc – As this document refers to ‘Fargate’, it is mandatory to have networking mode as awsvpc.
- Target Group
- Target Container Port
- Container Image, CPU & Memory for the Image
- Launch Type, Desired Capacity – Min & Max
- IAM Instance Profile, Health Check Grace Period, and other fields as required.
- Once, done with filling up all the fields in ‘Deploy’ Click on ‘Done’ and ‘Save Changes’
With this, you are all set to execute your AWS ECS with AWS Fargate Pipeline on Spinnaker.
If you want to know more about Spinnaker or request a demonstration, please book a meeting with us.
OpsMx is a leading provider of Continuous Delivery solutions that help enterprises safely deliver software at scale and without any human intervention. We help engineering teams take the risk and manual effort out of releasing innovations at the speed of modern business. For additional information, contact us
