
Deploy Spinnaker CD Pipelines in Kubernetes
Welcome to the OpsMx’s Tech Talk series about quick insight into Spinnaker. In this edition we will explain how to build your first Continuous Delivery pipeline that deploys to a Kubernetes cluster.
Here is a short video for the topic:
What is a pipeline in Spinnaker?
Pipelines are a way of managing deployments in a consistent, repeatable, and safe way. The pipeline is a sequence of stages provided by Spinnaker ranging from functions that manipulate infrastructure – like deploy, resize or disable, as well as a utility scaffolding function like manual judgment or run Jenkins job. These together precisely define your runbook for managing your deployments.
Prerequisites
- Have a working Kubernetes cluster
- Have the opensource Spinnaker installed with all other services
Getting Started with Spinnaker CD pipeline
Steps:
- Login to Spinnaker UI
- Select Applications from the top menu
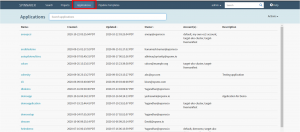
Select Applications in Spinnaker UI
Create a new application in Spinnaker
- Choose Actions-> Create Applications

Select Actions and Create Application in Spinnaker
The Create Applications window will pop up. Insert suitable values into the form fields.

New Application Window in Spinnaker
- Insert your application’s name in the ‘Name’ field e.g. Tech Talk
- Insert your email id in the ‘Owners Email’ field.
- Click on the ‘Create’ button.

Create the New Application in Spinnaker
A new application is created by the name of Tech Talk.

A new application is created in Spinnaker
Click on the application name. The application screen appears.
Create and configure Load Balancer in Spinnaker
- Choose the tab ‘Load Balancers’ under Infrastructure.
By default, the ‘Show Server Groups’ option remains checked and a message is displayed notifying “No load balancers match the filters you’ve selected”.

Create Load Balancers in Spinnaker
Click the ‘Create Load Balancer’ button on the right.
The ‘Deploy Manifest’ window for the load balancer is displayed.

Deploy Manifest window in Spinnaker
-
- Under ‘Basic Settings’, the Account name is Spinnaker
- Insert your yaml manifest code in the Manifest textarea.
- Click the “Create” button.
The window screen is refreshed. A new screen labeled “Deploying your manifest” displays the steps while a green progress bar highlights the progress of completion. On completion, a success message ‘Operation succeeded!’ is displayed.

Deploying your Manifest window in Spinnaker
- Click the ‘Close’ button.
The Load Balancer is successfully created.

Load Balancer is created in Spinnaker
Create and configure pipelines
- Choose ‘Pipelines’. By default, a message prompts that “No pipeline is configured for this application”.

Spinnaker CD pipeline deployment status
- Click on the link “Create a new pipeline”. The “Create New Pipeline” window appears.

Create a new CD pipeline in Spinnaker
- Insert a suitable name for the pipeline in the ‘Pipeline Name’ field e.g. Deploy Application.
- Click the ‘Create’ button.
The pipeline ‘Configuration’ form is displayed.

Spinnaker CD pipeline configuration form
In the Parameters section, click ‘Add Parameter’. A new parameter field is added.
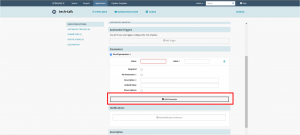
Parameters Section

Add a new parameter in the Spinnaker CD pipeline
-
-
- Insert a parameter name in the Name field e.g. Tag
- Check to select the options ‘Required’ and “Pin Parameters”. Insert Monday to the Default Value field.
- Click the button at the top ‘Add Stage’. The new stage screen appears.

Deploy Application Configuration in the Spinnaker CD pipeline
- Select the Deploy manifest option from the dropdown field Type.
- Change the Stage Name field as ‘Deploy Dev’.
- In the Deploy Manifest section under Basic Settings, select Account as Spinnaker.
- Check to select the option “Override the Namespace”.
- Select the Namespace field as Dev.
- Insert the yaml code in the Manifest textarea.
- Click the ‘Create’ button.
-
Under the Pipeline menu, the newly created and configured pipeline will be displayed.

Configured Spinnaker CD pipeline
Manually trigger Spinnaker CD pipeline

Manually trigger the Spinnaker CD pipeline
- Click on the button “Start Manual Execution”. The ‘Select Pipeline’ window appears.
- In the Pipeline field, select the pipeline you created above “Deploy Pipeline” and click the ‘Run’ button.
This executes the pipeline and the progress of the job is displayed on the screen. Clicking on the pipeline progress image will display some more information:
-
- Deploy Status
- Task Status
- Artifact Status

Spinnaker CD pipeline progress status
Clicking the ‘Details’ link in the Deploy Status tab reveals detailed information about the application you are deploying to the Kubernetes cluster.
Spinnaker CD pipeline deployment status
Validate the Deployment done using Spinnaker CD pipeline
Validate the application that was successfully deployed by opening it in the browser.
You can reach out to Marky Jackson at:
- GitHub: markyjackson-taulia
- Twitter: @markyjackson5
- LinkedIn: marky-jackson
If you want to know more about the Spinnaker or request a demonstration, please book a meeting with us.
OpsMx is a leading provider of Continuous Delivery solutions that help enterprises safely deliver software at scale and without any human intervention. We help engineering teams take the risk and manual effort out of releasing innovations at the speed of modern business. For additional information, contact us