Spinnaker Basics for Effective Continuous Delivery
Continuous Delivery (CD) is a process of deploying shippable code through the various phases of code check-in, building, testing in staging, and releasing them to live environments in a quick, safe, and sustainable manner. Spinnaker is a popular CD tool that provides you visibility and control into your software delivery process. In this blog, we will explore Spinnaker’s basics, its architecture, Spinnaker objects, installation procedures, learn how to create applications and pipelines, various features, security aspects, and how it compares with other CD tools.
What is Spinnaker?
Spinnaker is an open-source multi-cloud Continuous Delivery (CD) platform. It is used for building and releasing software changes with high velocity and confidence. Spinnaker takes out the manual and hands-off activities by automating the processes in CD. It supports deployments to multi-cloud environments like AWS, Azure, GCP, Cloud Foundry, Kubernetes, etc. It is easily extensible. Spinnaker also allows you to control the resources that got deployed during CD and view their current status. You can edit these resources from within the Spinnaker UI, scale up or scale down, and rollback when needed. Spinnaker helps organizations to :
- manage their application deployments in a multi-cloud environment,
- provides a single pane of control and visibility,
- enforces enterprise policies.
Spinnaker Architecture
Spinnaker has a microservice-based architecture. The major components are:
- Deck (UI to access Spinnaker)
- Gate (Manages API calls)
- Orca (Orchestration Engine responsible for pipeline and other operations)
- Clouddriver (Responsible to make calls to different providers e.g. AWS, Azure, Google)
- Front50 (Hold metadata of applications, pipelines, projects, and notifications)
- Rosco (Responsible for produce immutable VM images)
- Igor (Responsible to trigger pipeline)
- Echo (Responsible for Event triggers, send notifications to Slack, email, and so on).
- Fiat (Responsible for authorization in Spinnaker).
- Kayenta (Responsible for Canary Analysis)
- Halyard (Responsible for managing all Spinnaker services and configuration using CLI. Using this, we can update, rollback, and so on)
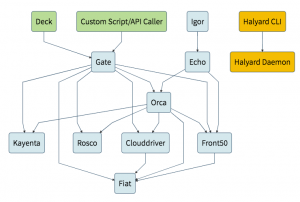
Spinnaker Architecture
Spinnaker Objects
Storage Providers
Storage providers allow you to store all your configuration and pipeline information like Google Cloud, AWS S3, Azure, Minio, Redis, MySql, and so on. Spinnaker uses Redis or MySql to store run-time performance data. You can later analyze the information and perform an audit. The storage objects are configured in values.yaml before installing the Spinnaker. You can even change them later in the halyard.
Cloud Providers
Cloud providers like Google Cloud, AWS, Azure, Kubernetes, Cloud Foundry, Oracle Cloud, etc., provide connectivity to cloud infrastructures, and Spinnaker has built-in support for multi-cloud deployments. You can use halyard for configuring them by running the command: hal config provider
Continuous Integration (CI) Systems
Spinnaker allows direct integration with your existing Continuous Integration (CI) systems like Jenkins, Travis CI, Google Cloud Build, Concourse, Wercker, CodeBuild, and so on. Build integrations can directly be triggered by the Spinnaker pipelines and vice versa. You can initiate a Jenkins build job from a Spinnaker pipeline or have a Spinnaker pipeline activated to complete a Jenkins build. You can use the halyard pod for configuring the CI platforms by running the command: hal config ci
It displays the list of CI platforms that you can manage and view the Spinnaker configuration for them. If you want to use Jenkins, you can configure it by running the command: hal config ci jenkins
Further, you can view the parameters and sub-commands that can be used with Jenkins by running the command: hal config ci jenkins - -help
You can enable or disable Jenkins. You can also configure it as a CI services master.
Artifacts
During development, various external resources are in use like the Docker images, Helm charts, Amazon machine images (AMI), Google cloud compute images, jar files in Maven repository, Github files, Bitbucket files, GitLab files, and so on. All these external resources can be accessed, managed, and used at different deployment stages from within the Spinnaker pipeline. They are identified in Spinnaker by their type like docker /images, GCS/object, s3/object, git/repo, etc. Some URI and account credentials reference them to access the artifact. Optionally other details like Name, Version, Metadata, Location, and Provenance, etc. can be used to define the artifact. You can use halyard for configuring them by running the command: hal config artifact
Methods of Spinnaker Installation
Spinnaker installation methods include:
- Distributed installation in Kubernetes environment – The recommended and best Spinnaker deployment option for production deployments is a distributed installation in some Kubernetes environments (Kubernetes, Openshift, AWS, GKE). This is because you can quickly scale and manage different components. There are published Spinnaker images from the Spinnaker community, and new releases are coming out frequently. Enterprises looking for superior reliability and security can opt for Red Hat Universal Base Images (UBI). The Spinnaker community provides the Helm Chart for Spinnaker installation and deployment. There is also an Operator available for Spinnaker installation, especially for Openshift users at the Openshift marketplace.
- Local installation using Debian packages – If you have a Virtual Machine (VM), you can do a single node installation of Spinnaker on that VM. But it becomes complex to manage workloads and is not recommended for production usage.
- Local installation from GitHub – If you want to develop further and enhance Spinnaker, you can do a local structure from GitHub.
Installing Spinnaker in Kubernetes
Prerequisites
It is recommended that the Spinnaker be installed on a machine with at least 20 GB of memory and six cores CPU for production purposes. It would help if you also had support for persistent storage in your Kubernetes cluster.
Custom Configuration
Using the Cloud Shell editor, you can also check, and you can customize your deployment by customizing the values.yaml file. You can manage the Spinnaker version to be installed and customize Spinnaker services. You can also update and configure the version of the Halyard. Spinnaker uses Redis and MiniIO storage objects locally, and if you don’t need persistence for these, you can turn it off.
Spinnaker Installation
You can access the Kubernetes cluster using the Google Cloud Shell (Built-in Editor).
- To view the nodes run the command:
kubectl get nodes
- To check the installed Helm Chart version run:
helm version
- To install Spinnaker run:
helm install spinnaker stable/spinnaker [-f values.yaml]
The installation process takes about seven to eight minutes. In a production environment, in order to expose the Spinnaker Gate and Deck service pods to the external network requests from outside of the Kubernetes cluster you need the Kubernetes Ingress or the LoadBalancer. There is a file called spinsvcs.yaml that will create a LoadBalancer service pointing to the Spinnaker Deck. Run the command: kubectl apply -f spinsvcs.yaml
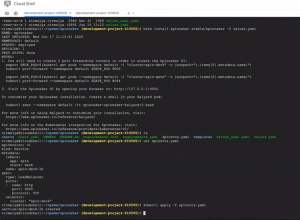
svcs yaml
During installation, if you look at the ‘Workloads’ in the GCP UI you can see the Spinnaker services and Halyard getting deployed. After the installation is complete, Spinnaker is accessible through an external IP address. Clicking the IP address (URL link) will launch the Spinnaker UI in your browser.
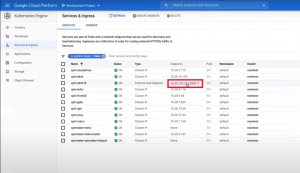
Access Spinnaker through an external IP address
Create Application
The Spinnaker UI allows you to create the applications that you want to manage and deploy using Spinnaker like a marketing application, sales application, or a shopping card application. To create a new application in Spinnaker, open the Applications tab, and click the ‘Create Application’ button‘. The “New Application” window is displayed where you need to insert suitable values for various form fields like ‘Name’ and ‘Owner’s Email’ and click the ‘Create’ button.
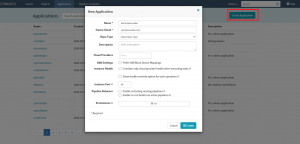
New Application window
The newly created application’s interface is displayed which shows the inventory of all the application’s resources like Clusters, LoadBalancers, Firewalls, Accounts, and so on. Clusters are the servers used for Kubernetes deployment in cloud environments or Amazon ECS/EC2 instances. Accounts are infrastructure resources that you use like a Kubernetes account or an AWS account. So if your application is using multiple accounts they are all displayed under the Accounts menu. If you use some set of special functions like lambda functions they are shown separately under a ‘Functions‘ tab. You can create your server groups manually by clicking on the “Create Server Group” button or through Pipelines which is the ideal way to do it.
Create a Pipeline
To create a new pipeline, click the “PIPELINES” link in the left menu in Spinnaker UI. If there are no pipelines created then there will be a blank screen displaying a message “No pipelines configured for this application.” and link “Configure a new pipeline”. Otherwise, all the existing pipelines are displayed as a list, and to create a new pipeline you need to click the link “Create” in the top menu. The “Create New Pipeline” screen is displayed. Here you will need to insert your desired name for the new pipeline in the “Pipeline Name” field. If there are more pipelines that have already been created earlier then an optional “Copy From” drop-down field appears next to the “Pipeline Name” field. This field lets you select other pipelines with different stages and saves your time in recreating them.
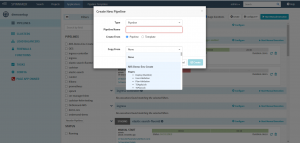
Create a new pipeline
After inserting the pipeline name click the “Create” button. The new pipeline configuration screen appears. It provides you various options like select execution options, add automated triggers, add various parameters, set up notifications, and describe the purpose of this pipeline.
Pipeline configuration options
- Execution Options – If a stage fails, you can halt the pipeline execution. Or even choose to ignore. You can choose to enable or disable concurrent pipeline executions and let them only run one at a time. If concurrent pipeline execution is disabled, then the pipelines that are in the waiting queue will get canceled when the next execution starts.
- Automated Triggers – You can add a trigger that executes the pipeline. Various event options can be selected like a CRON (schedule a time and frequency for pipeline execution), Git (execute a pipeline on code and check-in to Git repository), Jenkins (run a pipeline after Jenkins build), and so on. e.g., You can set the CRON job to trigger a pipeline every day at 9 a.m. when everyone is at the office, and some of the resources need to be scaled up and scale down while they leave the office at 6.30 p.m.
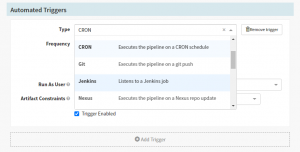
Automated Triggers
- Parameters – Spinnaker pipelines allow you to define different parameters which makes the pipelines templatized. You can then use the same pipeline across teams, use a pipeline to deploy to different namespaces in Kubernetes, deploy to different environments like Stage/UAT/Prod, or deploy to different geographical locations.
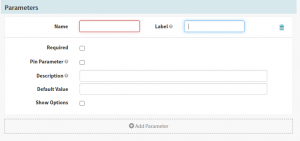
Parameters
- Notifications – You can configure notifications for different channels like email, Slack, google chat, etc, and notify the concerned project managers/DevOps/Dev/QA teams when the pipeline starts, completes, or fails. You can also set notifications and controls at different pipeline stages too.
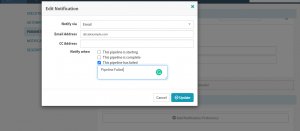
- Description – Description is an optional field that allows you to describe the purpose of the pipeline.
Once you have set all the above configurations you can save them by clicking the “Save Changes” button.
Add stage
Spinnaker deployment pipelines have one or more stages that are joined end to end implying when a stage is completed automatically the next stage is triggered. In the following example, we will deploy a simple manifest that will deploy an NGINX server and create a service to access it.
Click the “Add Stage” button on the top.

Add stage
A form for configuring the new stage is displayed. The “Type” dropdown field lets you select a lot of inbuilt stages that are available like “AWS CodeBuild” (Triggers a build-in AWS CodeBuild), “Bake” (Bakes an image), and “Deploy” (Deploys the previously baked or found image). You can also deploy pipelines that trigger other (child) nested pipelines, and so on.
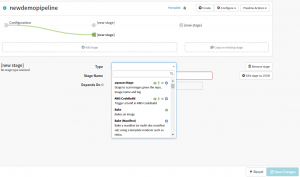
Add stages
For our first stage, we will select “Deploy (Manifest)” as the “Type,” and the “Stage Name” field is automatically set as “Deploy (Manifest)”. The “Depends On” field that states which stages must be run before this stage begins. You can leave this field blank as the first stage does not depend on any other stages. A form to set up the configuration for “Deploy (Manifest)” is displayed.
Under the “Basic Settings” section, you will need to select a Spinnaker ‘Account‘ ( that corresponds to a physical Kubernetes cluster), check the “Override Namespace” option, and select the targeted ‘Namespace‘.
Your deployment manifest can come from your artifact (code) repository like GitHub or Artifactory, for which you need to select your “Manifest Source” as ‘Artifact‘ and select the “Manifest Artifact” if available or define a new artifact. (The artifact that is to be applied to the Kubernetes account for this stage should represent a valid Kubernetes manifest.) Otherwise, you can also select the ‘Text‘ option as the “Manifest Source”. You can copy-paste your manifest YAML code here. You can choose the artifacts to bind and enable a deployment “Rollout Strategy” like Canary/Blue-Green.
Click the “Save Changes” button to save the configuration.
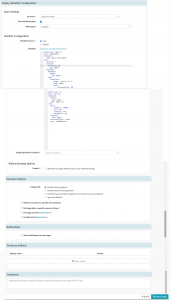
Deploy Manifest Config
You also have the option to “Edit the stage as JSON”. The JSON script represents the stage configuration in its persisted state. You can then update the stage by clicking the “Update Stage” button. So you can manage your pipeline-as-code.
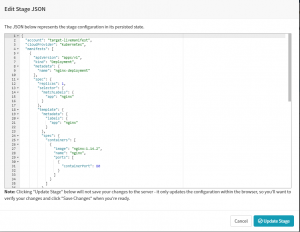
Edit Stage JSON
For the second stage, we will select the ‘Type’ as “Manual Judgement” that waits for you to review the results and the pipeline is aborted if you disapprove. You can set up the configuration for this stage in the form and save it. As this stage depends on the “Deploy (Manifest)” stage ensure that the same is selected in the “Depends On” form field.
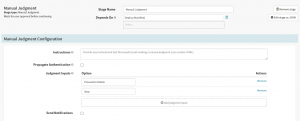
Manual Judgment
Also, set the Execution options as “ If a stage fails – halt the entire pipeline”. This will immediately halt the execution of all running stages and fail the entire execution.
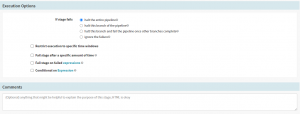
Execution Options
You can add more stages and set them to run concurrently or selectively depending on the results of the previous stage executions. So depending on the manual judgment we can either set further stages as “Delete (Manifest)” or deploy to test and so on. The entire pipeline that is set up is visually represented at the top section of the pipeline configuration screen.

Entire Pipeline
Spinnaker gives you the flexibility to easily move any of the stages across the pipeline and run them serially or parallelly.
Execute Pipeline
Click the “Back to Executions” icon to go back to the pipelines page.
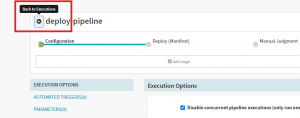
Back to Executions
Click the “Start Manual Execution” link to trigger the pipeline execution manually.

Start Pipeline execution manually
As the pipeline execution starts a progress bar shows the execution status. Clicking on the progress bar reveals the pipeline details and you can monitor the progress. After the “Manual Judgement” stage is executed the pipeline waits for manual approval of the next stage of the pipeline to be continued or stopped.
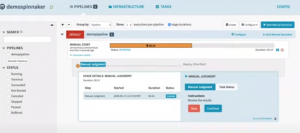
Pipeline execution status
You can also see the yaml of the service that is being deployed by clicking the yaml link in the details of the deployment status.
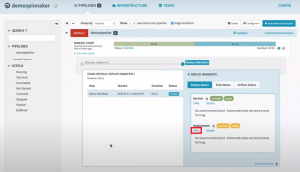
Check YAML
The yaml details are displayed on a screen that pops up. You will find that Spinnaker adds a lot of metadata to the deployment manifest that allows it to manage the deployment like scale up the resources or rollback the deployment.
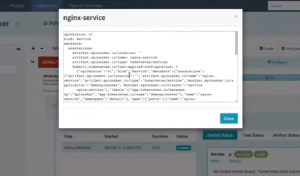
YAML details
You can also check the task status which is a list of activities during deployment.
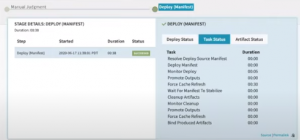
Task Status
After the deployment is done you can go and check the “Infrastructure” section to see the deployment results. You will see the Nginx server with a single service pod has been deployed. By clicking the “Logs: Console Output” link you can see the output of the pod without needing to kubectl. When you have a pod that is not healthy, instead of giving your end-users/developers direct access to your staging or prod environments you can let them check the logs to find out what went wrong.
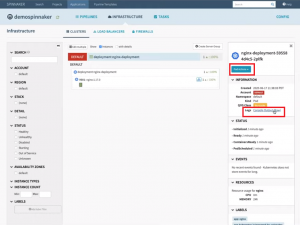
Deployment results -Infrastructure
By clicking the “Pod Actions” button you can take action on the Pod like edit and update the manifest or even delete the pod.
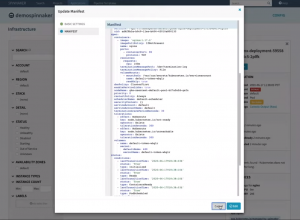
Edit pod
Depending on the load you can scale up or scale down your resources by adding/removing one or more nodes/pods. To do this go to the deployment, click “Deployment Actions” and select ‘Scale’.
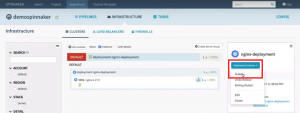
Deployment actions – Scale
You can set the number of replica pods on the screen that pops up, provide an account name, and submit.
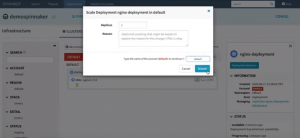
Set the number of replica pods
You can check the ‘LoadBalancer’ service by clicking on the service icon in the pod.
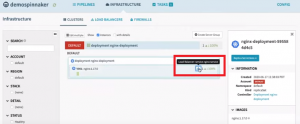
Check Service
It shows you the internal IP and ingress URL to access the Nginx service.
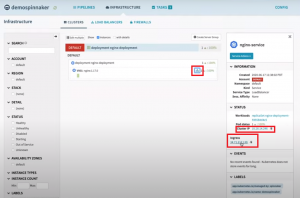
Access Service
Clicking on this ingress URL opens up the deployed NGINX server UI in your browser.
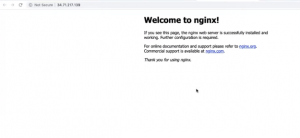
Nginx UI
You can also read about How Spinnaker can be used to deploy into AWS ECR. Or if you want a detailed demonstration, you can click here.
Spinnaker Features
Multi-Cloud deployments
Spinnaker not only allows you to have visibility but also have control over the resources of your deployments. The above example shows deployment to the Kubernetes environment. Similarly, you can deploy to other cloud environments like AWS, Azure, GCP, and so on. So from the same Spinnaker UI, you can deploy and control resources in multiple accounts.
Pipeline-as-code
Spinnaker defines its pipeline-as-code. The whole pipeline is stored and managed as a JSON file. So you can maintain them in a code repository like GitHub and load them from there. A Spinnaker pipeline can be used as a master to update other Spinnaker pipelines. They can be synced so that whenever there’s an update to Git repo, the pipelines get updated.
Spinnaker also allows you to create and maintain pipeline templates to use them to create new pipelines easily. Whenever a pipeline template is updated, all the pipelines that inherit them get updated too. So if you add a new stage (say security scan stage), the inherited pipelines will have this stage added too. It is an excellent way to enforce uniformity across different pipelines.
Security features in Spinnaker
Spinnaker has in-built support for security that makes it suitable for enterprises where security is a prime concern. The following security features can be easily enabled:
- SSL/TLS – The Spinnaker UI and API end-points can be SSL/TLS enabled which secrets it against external network requests. Communication between the different Spinnaker microservice can also use TLS authentication. To invoke security for the Spinnaker UI run the following command in halyard:
hal config security ui ... - Authentication– Users in Spinnaker can be authenticated by using LDAP, OAUTH2, SAML, X.509 certificates. To invoke authentication run the following command in halyard:
hal config security authn ... - Authorization– Different Spinnaker user groups (developers/testers/DevOps) have different levels of authority while performing different tasks. Developers may not be authorized to deploy to prod environments while only the DevOps team members are permitted to do so. LDAP, Active Directory, SAML, Google Groups, GitHub Teams services can be used to control access for different applications, accounts, and pipeline executions. To invoke authorization run the following command in halyard:
hal config security authn ... -
RBAC– Spinnaker also has RBAC built-in restricting the ability to deploy to different environments (dev/stage/prod) based on individual users’ roles within an enterprise. Learn about security features in Spinnaker.
Spinnaker vs. Jenkins and Other CD tools
To use Jenkins, which is specialized as a CI (Continuous Integration) tool for CD (Continuous Delivery), you need to write many custom scripts. Spinnaker has natively built-in features for creating deployment pipelines, scaling up/down resources, implementing RBAC, using different deployment strategies (Canary/Blue-Green, automated rollback), and so on. Spinnaker complements Jenkins to create end-to-end CI/CD pipelines to rollout quality deployments faster and at scale. Check out this blog about Jenkins VS Spinnaker.
On the other hand, a CD tool like Tekton is purely focused on deployments to Kubernetes environments, whereas if you want to have multi-cloud support, Spinnaker should be your go-to tool of choice. But if you’re going to manage AWS resources, Lambda functions, ECS resources, Cloud Foundry along with Kubernetes, Spinnaker is the ideal tool that should be used.
If you are well versed with Spinnaker do check out “OpsMx Enterprise for Spinnaker Cloud Trial”
Or you can always request for a demo:
OpsMx is a leading provider of Continuous Delivery solutions that help enterprises safely deliver software at scale and without any human intervention. We help engineering teams take the risk and manual effort out of releasing innovations at the speed of modern business. For additional information, contact us
About the Author

Nirmalya Sen
Nirmalya Sen is a 25+ year industry veteran who has worked in companies like IBM, Oracle, and Cisco. He was a founding member of a successful startup that went public in India. The company later got acquired by Mindtree. He has been building and delivering enterprise software all throughout his career and managing globally distributed teams. His current passion involves solving software distribution challenges in the cloud computing era.
LinkedIn: https://www.linkedin.com/in/nirmalyasen/
